
Tutorial - Coimbra Stairs
Updated on
in
Tutorial
Photography
Tags:
Coimbra
Photoshop
Post Processing
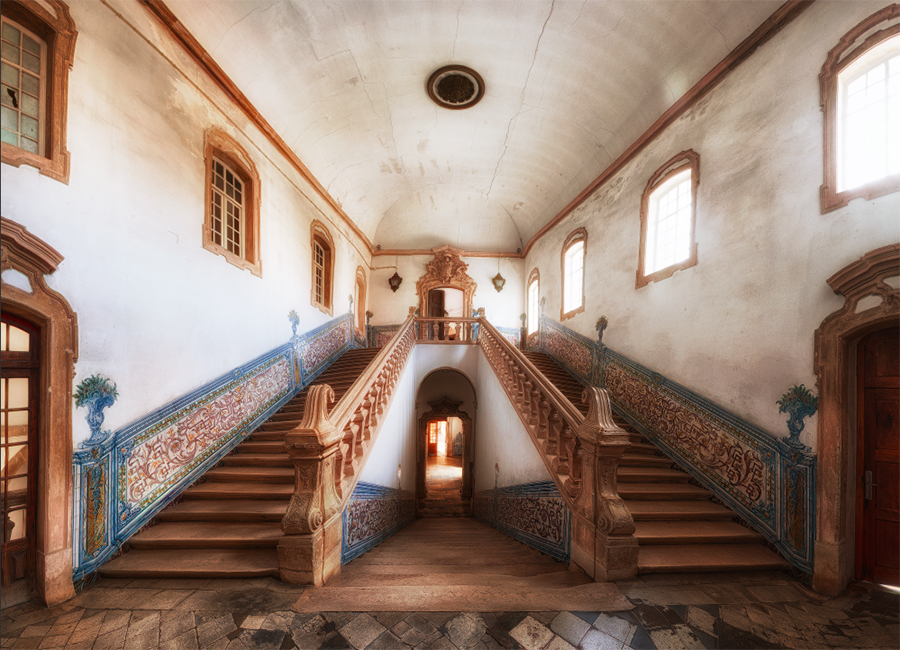
I used to live in Portugal on and off for several years. Unfortunately, I only got into photography after I left the country. When I recently I had the opportunity to return to Portugal I already had a few shoots in my mind. One of them was to get a shot of the University of Coimbra. Shooting in the ancient library was prohibited, but fortunately I remembered this stair well in one of the administration buildings. My goal with this shot was to capture a feeling of the old and long history of the University.
Setup & Settings
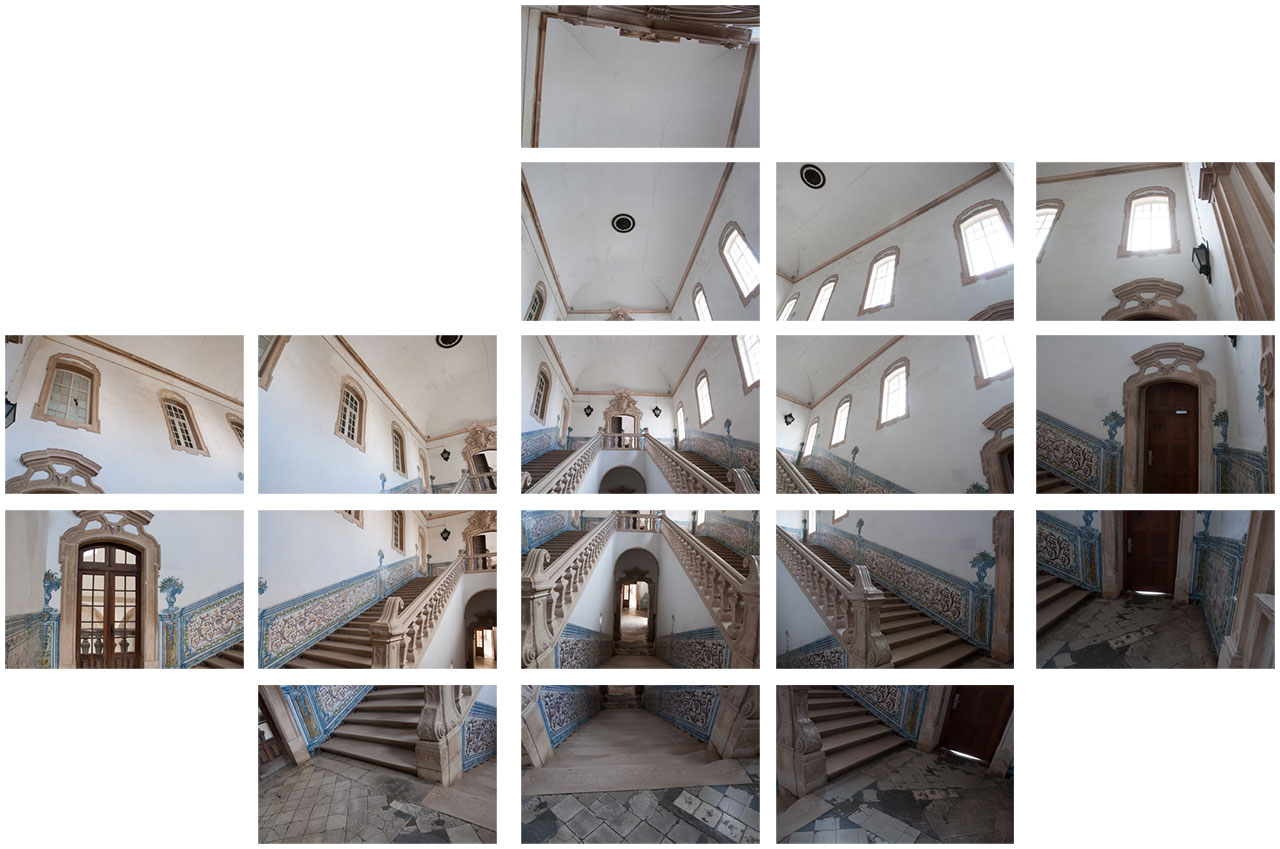
I shot the picture with my D90 and the 18-105mm lens mounted on my tripod. Even at 18mm the lens was not capable to capture all of the stairs. I therefore decided to use several overlapping shots and stitch them together in a panorama. I wanted to have this light overflowing feeling and therefore exposed for the interior. I shoot all pictures the lens’s widest setting of 18mm to capture the maximal possible amount of scene in a single shot and therefore reduce the number of total shots. I used manual mode to ensure that all pictures have the same exposure. This is important to ensure that the fit together when we create the panorama. I chose an aperture of f/16 to have a bigger depth of field to ensure that I have everything in focus. I shoot the the pictures at the lowest ISO setting of my camera (for the D90 this is ISO 200) to get the lowest possible noise in the pictures. Determined by those choices I need to use a shutter speed of 1s to get a proper exposure. In total I captured 17 pictures which I then processed as described in the next section. The whole shooting part took no longer than 10-15 minutes. The picture below shows the 17 shots roughly aligned.
Post-Processing
In the following steps I describe the main post-processing steps. I deliberately omit minors adjustment (such as clone-stamp cleanups) to focus on how to achieve the main look of the image. If you need more information do not hesitate to contact me.
-
Apply the lens correction and chromatic aberration correction to get a clean place to start from. [Lightroom]
-
Export smaller versions of the files to speed up the post-processing. Export 16-bit files to give you the most flexibility in the later steps. Also make sure that you export all metadata, in particular the camera and lens information. This is important for the later steps. [Lightroom]
-
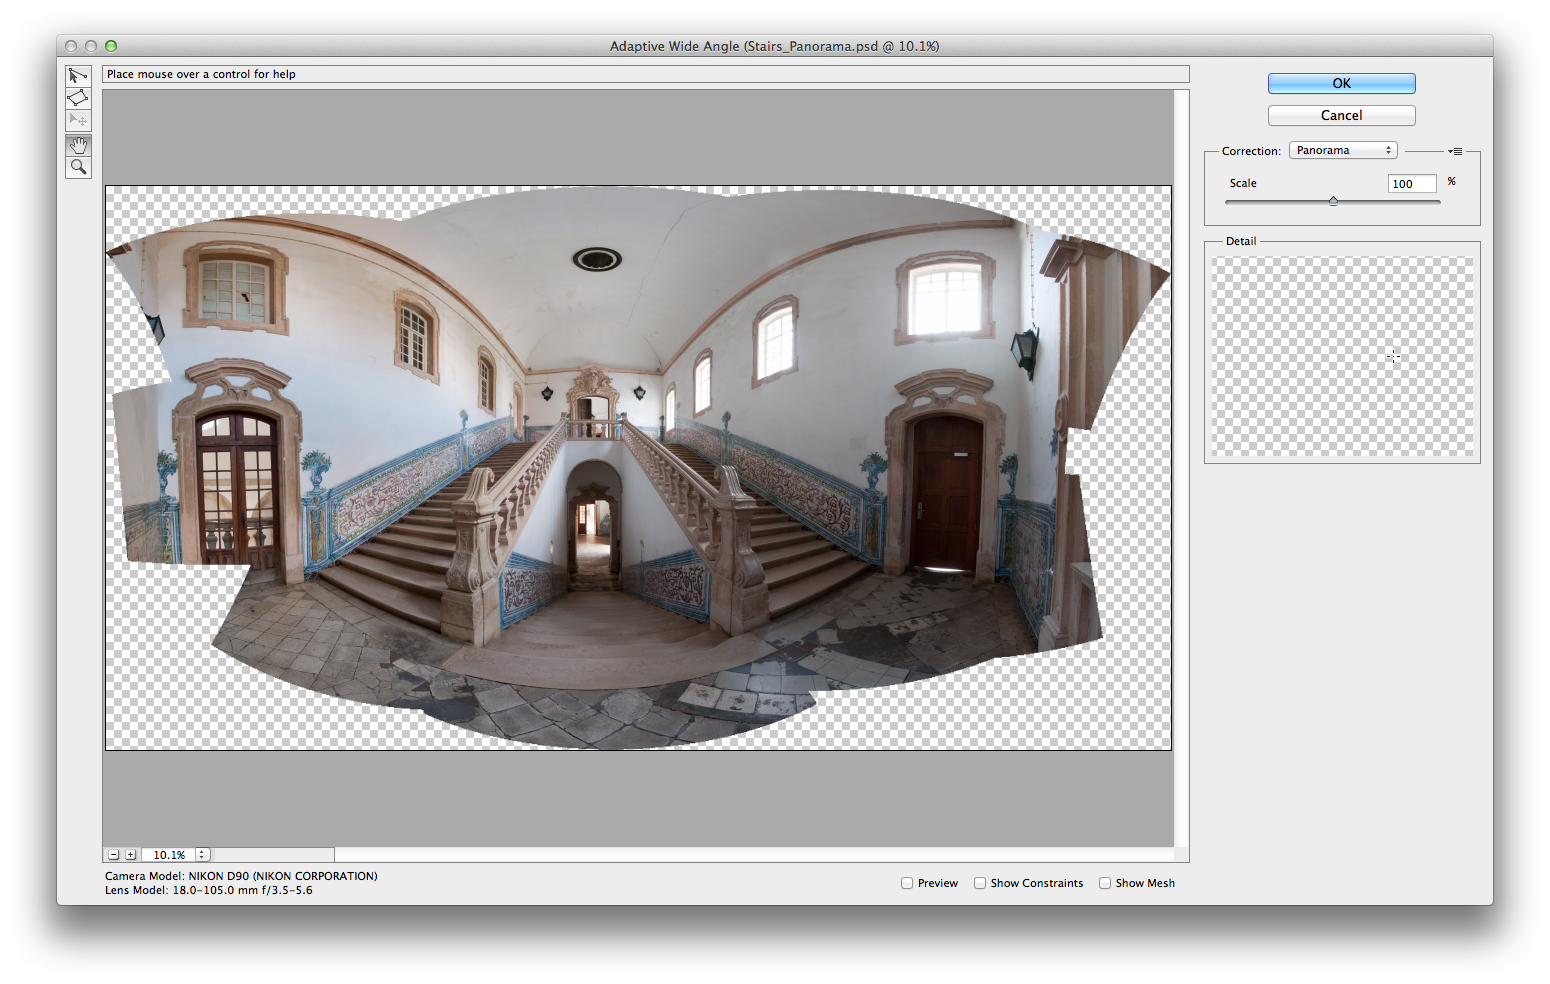
Merge the individual pictures with Photoshop ‘photomerge’. Choose automatic and Photoshop will do the right thing by default. [Photoshop]
-
Use the adaptive wide-angle lens correction filter to straighten the picture out. If you properly export your meta information in the input files Photoshop will recognize your lens and will do a much better job in correcting the distortions. [Photoshop]

-
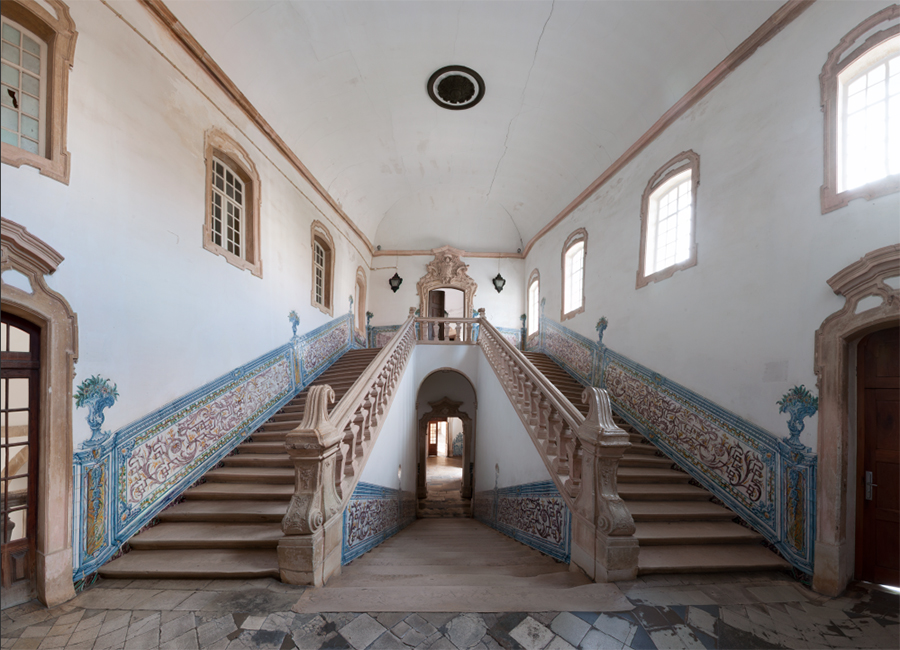
Crop the layer to get rid of the excess dead area. [Photoshop]
-
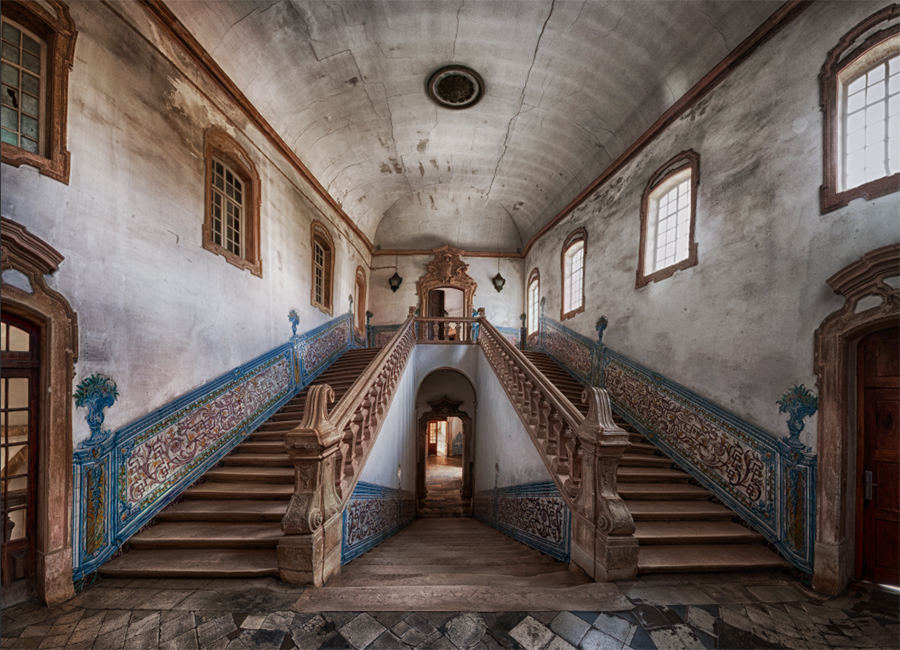
Duplicate the layer and apply Nik HDR Efex Pro. Choose the Dramatic or Sinister effect and adjust to taste. [NiK]
-
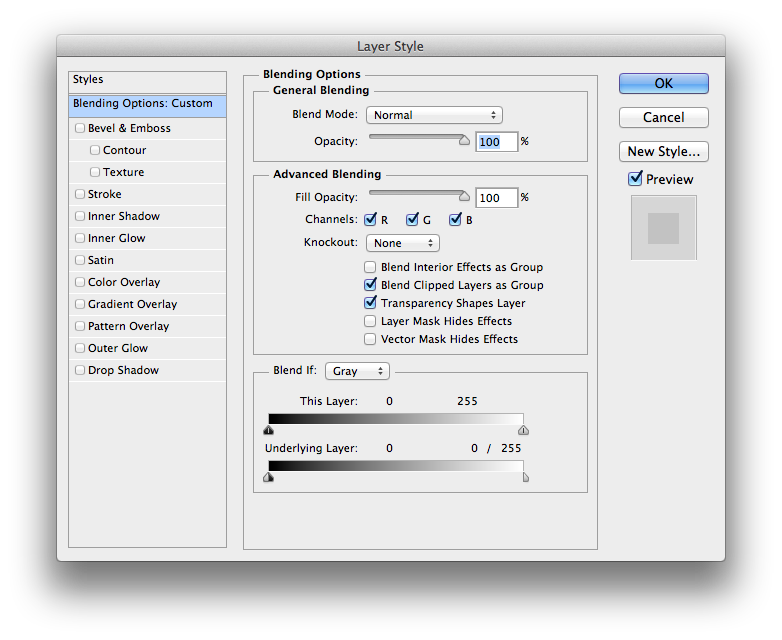
Use blend-if feature to cleanup the dirty whites of the the HDR layer and reduce the overall effect. Make sure that you split the handle of the white slider to create a smoother blending. [Photoshop]

-
Apply Nik Color Efex Pro Sunshine filter to the overall picture to give it more atmosphere. [NiK]
Hints
-
Take more pictures than you think you need. I particularly cover the corners of the pictures. My first set of shots did not cover all the shots all the corner areas. When I tried to merge the pictures the result looked more like a cross and missed all the information in the edges. Fortunately, I noticed this while I still was in Coimbra and could go back and take shots that covered more of the area.
-
Choose a good time for the pictures. In my case, I wanted to have the light flooding through the windows. Therefore the late afternoon was the right time. As said the building is an active part of the daily university operation and there are many people commuting through the building. This means choosing a time between lectures was of paramount importance.
-
Keep an open mind. I pre-visualized the shot and executed the shoot accordingly. My first version of the picture was pretty close to what I envisioned, but I did not really like the result. I tried a view more variants until I reached the final version.